Vape Maintenance 101: How to Clean Your Device, Extend Coil Life & Stop Leaks (2026 Guide)
A dirty vape not only tastes bad – it can leak, produce less vapour, and even become a safety hazard. Learning how to clean your vape device properly is one of the easiest ways to save money and enjoy a consistent flavour. In this guide, we’ll show you step-by-step how to clean pod systems and tanks, when to replace coils, and how to prevent common leaks. No brand recommendations – just universal tips that work for any refillable vape.
Before you start cleaning, always remove the battery or power off the device. If your device uses removable 18650 batteries, check our battery safety guide first. Now let’s dive in.
Why Cleaning Your Vape Device Matters
Over time, e-liquid residue, dust, and caramelised sweeteners build up inside your pod or tank. This leads to:
- Muted or burnt flavour – old gunk burns onto the coil
- Reduced vapour production – airflow gets blocked
- Leaking – O-rings degrade or seals get clogged
- Shorter coil life – you’ll need replacements twice as often
A quick clean once a week (or every few refills) keeps your vape tasting fresh and saves you money on coils.
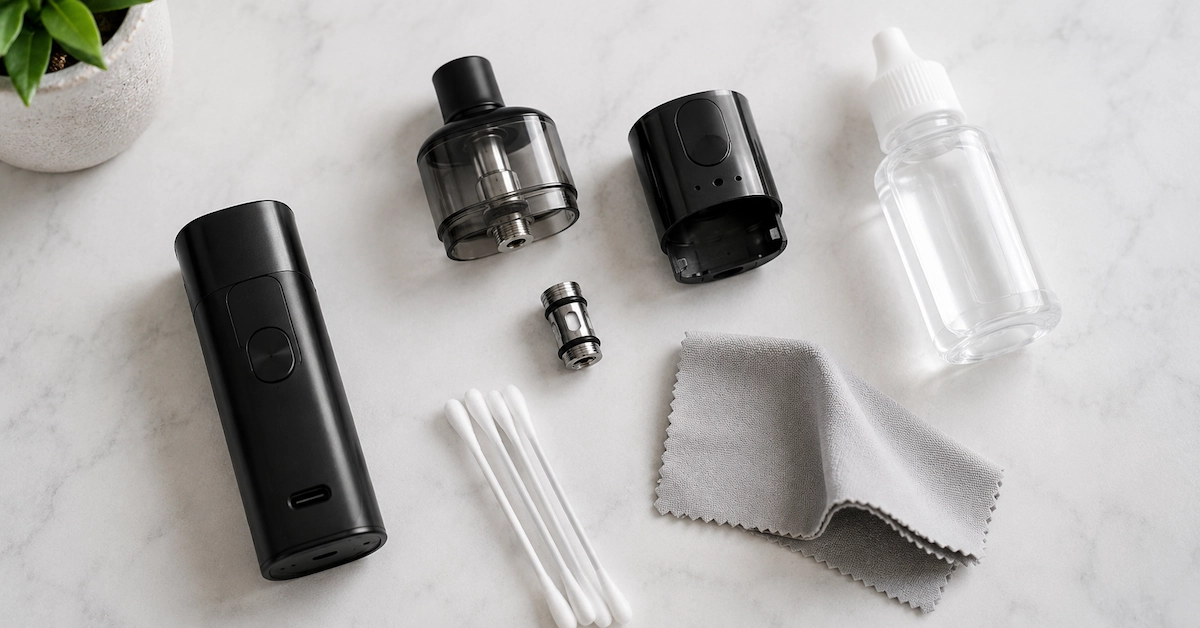
What You’ll Need
- Warm water (or a small bowl)
- Paper towels or a clean microfiber cloth
- Cotton swabs (Q-tips)
- Optional: Isopropyl alcohol (70% or less) for deep cleaning – rinse thoroughly after
- Your vape device (disassembled)
Step-by-Step: How to Clean Your Vape Device
Step 1: Disassemble Your Device
Separate the pod or tank from the battery. If your device has a removable drip tip (mouthpiece), take that off too. Empty any remaining e-liquid from the pod or tank – you can pour it back into the bottle if it’s still clean, or discard it.
Step 2: Rinse the Pod/Tank with Warm Water
Hold the pod or tank under running warm (not boiling) water for 10-15 seconds. This removes most e-liquid residue. For stubborn gunk, let it soak in warm water for 10 minutes. Avoid submerging the battery or any electronic parts.
Step 3: Clean the Coil (or Replace It)
Coils cannot be washed effectively – water won’t remove burnt residue from the cotton. Instead:
- If your coil tastes burnt or is more than 1-2 weeks old, replace it with a new one.
- If it’s fairly new and you’re just cleaning the tank, set the coil aside. Do not rinse it unless it’s a special “reusable” coil (very rare).
Step 4: Dry Everything Thoroughly
Use paper towels to pat dry the pod/tank. Then let all parts air dry for at least 20-30 minutes. Any leftover water will dilute your e-liquid and cause spit-back. Cotton swabs help reach tight corners.
Step 5: Clean the Battery Contacts and Airflow
Dip a cotton swab in a tiny amount of isopropyl alcohol (or just use a dry one) and gently wipe the metal contacts inside the battery compartment and on the bottom of the pod. Also wipe the airflow holes. This removes sticky residue that can cause poor connection or auto-firing.
Important: Never drip liquid into the battery – just a light dab on the swab is enough.
Step 6: Reassemble and Prime the Coil
Once everything is completely dry, put the coil back into the pod/tank (or install a new coil). Fill the pod/tank with e-liquid and wait 5-10 minutes before vaping – this allows the cotton to saturate, preventing dry hits.
How to Prevent Leaks (Common Causes)
Even a clean vape can leak. Here’s what to check:
- Overfilling: Leave a small air bubble in the pod/tank – don’t fill to the absolute brim.
- Damaged O-rings: Inspect the rubber seals around the pod/tank. Replace if cracked or flattened.
- Temperature changes: Leaving your vape in a hot car or direct sunlight thins the e-liquid, causing leaks. Store it upright at room temperature.
- Worn-out coil: An old coil’s cotton degrades, allowing liquid to pass through. Replace coils regularly.
- Loose connections: Ensure the coil is screwed in snugly (but not over-tightened).
When Should You Replace Your Coil Instead of Cleaning?
Cleaning the tank won’t revive a burnt coil. Replace your coil when you notice:
- A persistent burnt or dry taste
- Very little vapour even after charging the battery
- Gurgling sounds (sign of flooded coil)
- Dark brown or black gunk visible on the cotton through the wicking ports
Typically, a coil lasts 1-3 weeks depending on how sweet your e-liquid is and how often you vape. Always keep a spare coil handy.
Quick Daily Maintenance Tips
- Wipe the mouthpiece and airflow slots with a tissue after each refill.
- If you won’t use your vape for several days, empty the pod/tank and store it separately.
- Charge the battery before it’s completely dead – this prolongs battery life.
- Use the correct e-liquid ratio (e.g. 50/50 PG/VG for most pods; high VG may leak in small pods).
Frequently Asked Questions (FAQ) – Vape Cleaning & Maintenance
Can I use soap or detergent to clean my vape tank?
No. Soap residue is difficult to rinse off completely and will ruin the flavour of your e-liquid. Stick to warm water. For deep cleaning, use isopropyl alcohol (70%) followed by multiple warm water rinses and thorough drying.
How often should I clean my vape device?
For daily vapers: at least once a week. If you switch flavours often, clean between each flavour change to avoid mixing tastes. Heavy users may need to clean every 3-4 days.
My vape is leaking – is it always a cleaning issue?
Not always. Leaks can also come from a worn coil, damaged O-rings, overfilling, or using e-liquid that’s too thin (high PG). Check all these factors. Regular cleaning helps, but you may need to replace parts.
Can I clean disposable vapes to reuse them?
No. Disposable vapes are sealed and not designed to be cleaned or refilled. Attempting to open them can damage the battery or cause leaks. If you want a reusable device, switch to a refillable pod system.
Keep Your Vape Running Like New – Without Spending Extra
Learning how to clean your vape device takes just a few minutes a week but saves you money on coils and replacement pods. It also ensures every puff tastes as good as the first. For more safety tips, check our battery safety guide.
👉 Want more vaping tips? Subscribe to our free weekly guide – one email per week, no spam.
This guide applies to all refillable vape devices, regardless of brand. Always follow your manufacturer’s manual for device-specific instructions.