Kamry The Ultimate Vape Maintenance Guide: Clean Your Device Like a Pro (2026)
Let me tell you a story. When I first started vaping, I was lazy. Really lazy. I’d use a coil until it looked like a burnt marshmallow, and when the flavour got weird, I’d just buy a new bottle of juice thinking the problem was the liquid. Spoiler: it wasn’t. It was my filthy, neglected vape. That’s why I eventually sat down and learned a proper vape maintenance guide – not from a corporate blog, but from trial, error, and a friend who finally said “dude, clean your tank”. So this is everything I wish someone had told me, with zero fluff.
The real cost of skipping maintenance (it’s more than bad taste)
I used to change coils every three days. Three days! Each coil costs around €3–5. Do the math: that’s €30–50 a month just on coils. After I started following a simple vape maintenance guide – cleaning my tank weekly, drying everything properly – my coils started lasting two weeks. Same juice, same wattage. The only difference was regular cleaning. So yeah, maintenance isn’t just about flavour; it’s about keeping money in your pocket.
Also, have you ever had a vape leak in your pocket? Sticky brown stain on your jeans, and that weird smell that doesn’t wash out? That’s also a maintenance issue. Old O-rings, loose coils, or built-up gunk can break the seal. Cleaning fixes most of that.
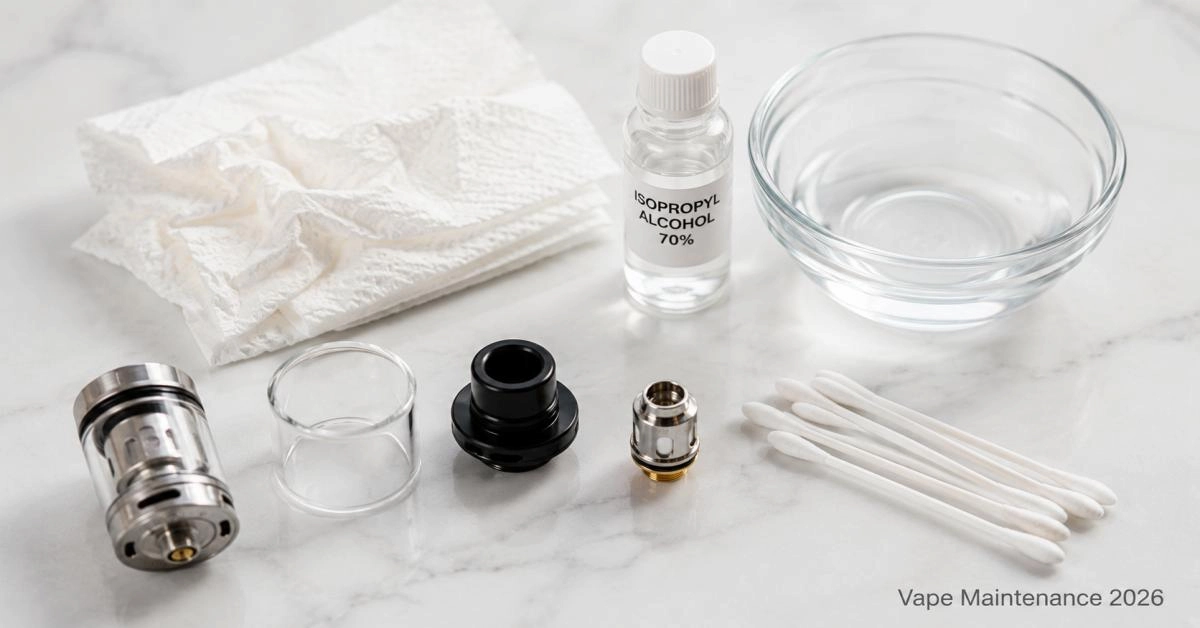
What you’ll actually need (raid your kitchen drawer)
You don’t need special brushes, ultrasonic cleaners, or a degree in engineering. Here’s the real list:
- Paper towels – the cheap ones are fine, just not tissues (they fall apart).
- Cotton swabs – Q-tips, whatever brand.
- A small bowl – for soaking parts in warm water.
- Warm tap water – distilled is nicer but absolutely not necessary.
- Isopropyl alcohol (70%) – optional, only for really stubborn residue.
That’s it. I’ve been cleaning my vape with these for years, and my devices still work like new. So if any blog tells you to buy a €50 cleaning kit, close the tab.
How often should you really clean? (be honest with yourself)
There’s no one-size-fits-all answer. It depends on how much you vape:
- Heavy vaper (10ml+ per day): clean once a week. You’ll notice gunk building up fast.
- Moderate vaper (2-5ml per day): every two weeks works well.
- Occasional vaper (weekends or social): once a month, or whenever the flavour starts to fade.
But don’t just go by the calendar. Your device will tell you it’s time for a vape maintenance guide session when:
- Your juice tastes muted – like someone turned down the volume on the flavour.
- You hear gurgling or spitting (old liquid boiling weirdly).
- You see dark brown gunk around the cotton holes of your coil.
- Vapour production drops significantly.
When those signs appear, clean. Don’t wait for a scheduled date.
Step-by-step: the actual cleaning process (with mistakes I’ve made)
1. Disassemble everything. Everything.
Take your tank off the battery. Open the top cap, remove the glass tube if it’s removable, pull out the coil, and separate the mouthpiece. Lay all the parts on a paper towel. Look at the sticky brown residue on the threads and inside the base. That’s the enemy – old e‑liquid that’s caramelised and turned into gunk.
Watch out for the tiny rubber O-rings. They’re small, black, and love to roll off the table. I’ve lost at least three and had to order replacement packs. Don’t be me. Put them in a safe spot or leave them on the threads if they’re not falling off.
2. Rinse everything except the coil and battery
Run warm water over the metal base, the glass tube, the mouthpiece, and the top cap. Do not use soap. I know it feels wrong to clean without soap, but soap leaves a film that you’ll taste for the next ten fills. Just water. If there’s stubborn baked-on gunk, let the parts soak in warm water for 10–15 minutes. Then rub gently with your finger – it usually comes off.
Never put the coil under running water? Actually, you can rinse a coil, but it’s a temporary fix. More on that in a moment. And obviously, never ever put the battery in water. I once saw a forum post where someone asked if they could wash their mod in the dishwasher. Please don’t. Use a dry cloth or a cotton swab for the battery connector.
3. The coil dilemma – to clean or replace?
Here’s the honest truth: coils are consumables. They’re designed to be replaced, not cleaned. A fresh coil always tastes better than a cleaned one. But if you’re in a pinch and the coil is only a few days old, you can try to extend its life.
How to clean a coil (temporary): Hold it under warm running water (from the top where the cotton is) until the water runs clear. Then blow through the coil from the top – like you’re blowing into a straw – to push out excess water. Let it dry for at least 24 hours. After that, it might give you another 3–5 days of decent flavour. Will it be like new? No. But it can save you a trip to the shop.
If you want a real vape maintenance guide that actually saves you money, buy spare coils in bulk. They’re cheap online. A 5-pack usually costs less than a beer and a sandwich.
4. Drying – the step everyone rushes (including me)
I’m guilty of this. Rinse, shake, screw everything together wet, and then wonder why my vape is spitting hot liquid into my mouth. Water doesn’t vaporise nicely; it spits, dilutes flavour, and can cause tiny shorts in the battery connector if moisture gets into the 510 pin.
So here’s the right way: use paper towels to dry each part individually. For the small threads and airflow holes, roll a corner of the paper towel into a point or use a cotton swab. Then let everything air dry on a fresh paper towel for another 10 minutes. Go make tea, reply to a message, or just stare at the wall. When you come back, everything will be bone dry.
5. Clean the battery connector – the most overlooked spot
Look at the top of your mod or battery. See that metal circle with a little gold-plated pin in the middle? Over time, leaked e‑liquid collects there, turning into a sticky brown gunk. That gunk can cause “check atomizer” errors, weak hits, or even battery venting in extreme cases.
Take a dry cotton swab and wipe it out gently. If it’s really crusty, dip the swab in a tiny bit of isopropyl alcohol (70%), then wipe, then dry immediately with the other end of the swab. Never poke the centre pin with anything sharp – it’s spring-loaded and can break. Just gentle wiping.
I ignored this for a whole year, and my mod kept saying “no atomizer”. I almost bought a new device. Turns out, the connector was just filthy. A 30-second clean fixed everything. For more battery care, read our guide on 5 warning signs your battery might explode.
6. Reassemble and prime like a pro
Screw the tank back together (hand‑tight only – don’t use pliers). Put in a fresh coil or your thoroughly dried one. Fill the tank with e‑liquid, leaving a small air bubble at the top (this prevents leaks). Wait at least 5 minutes. I know you’re excited, but if you fire it immediately, the cotton will be dry and you’ll get a burnt hit that ruins the coil forever.
After waiting, take a few “dry puffs” – suck on the mouthpiece without pressing the fire button. You’ll see tiny bubbles rising from the coil. That’s the liquid soaking into the cotton. Good. Then start at a low wattage (half your normal setting), take a few puffs, and gradually increase to your preferred wattage. This “ramp‑up” prevents burning.
Special cases: pod systems, disposables, and RBAs
Refillable pod systems (Caliburn, XROS, Kamry pods, etc.)
These are simpler. Remove the pod from the battery. If the pod is refillable, empty any leftover liquid, rinse with warm water, and dry with a paper towel. Clean the battery contacts with a dry cotton swab. If the pod has a built‑in coil (non‑replaceable), you can’t clean the coil – just replace the whole pod when flavour dies. A tip: after filling a new pod, let it sit for 10 minutes instead of 5. Pods have thicker cotton and need more time to saturate.
Disposables (like Elf Bar, Lost Mary, OKSO)
Honestly, you can’t really maintain a disposable. Once the battery dies or the flavour turns bad, recycle it and buy a new one. You can wipe the mouthpiece with a damp cloth, but that’s about it. If you’re using disposables regularly, consider switching to a refillable pod system – it’s way cheaper and better for the environment. (I made the switch and never looked back.)
Rebuildables (RDA/RTA)
If you’re into rebuildables, you already know the drill. Remove the old cotton, dry burn the coil at low wattage to burn off residue, then rinse the deck and coil under water. Let it dry, then install fresh cotton. This can make a coil last months. But that’s a topic for another guide.
Common problems and how to fix them (without crying)
Leaks
I used to think leaking was just a fact of life. Turns out, it’s almost always preventable. Three main causes:
- Overfilling: Leave a small air gap at the top of your tank. If you fill to the brim, pressure will push liquid out of the airflow.
- Loose parts: Make sure your coil is screwed in tightly (but not forced), and your tank is fully closed.
- Heat: If you leave your vape in a hot car, the liquid thins and leaks. Keep it in your pocket or bag.
For more detailed fixes, check out our article on what causes vape leaking and how to fix it quickly.
Burnt taste
If your vape tastes like burnt popcorn or a campfire, it’s almost always a coil issue. Try these in order:
- Did you prime the coil? (wait 5+ minutes after filling)
- Is your wattage too high? Check the recommended range printed on the coil.
- Is your tank almost empty? Don’t vape the last few drops – the cotton will go dry and burn.
- If none of the above, the coil is dead. Replace it.
Gurgling or spitting
That annoying sound and hot liquid in your mouth happens when there’s too much e‑liquid in the coil or airway. Fixes:
- Flick the vape like a thermometer (downwards) to shake out excess liquid.
- Increase wattage slightly – higher heat vaporises liquid faster.
- Clean out the mouthpiece and airflow holes with a paper towel.
Short battery life or “check atomizer” errors
First, clean the 510 connector as described in step 5. If that doesn’t help, make sure your coil is making contact (screw it in firmly). If you’re still getting errors, the coil might be dead or the mod’s pin might be stuck. Gently pry up the centre pin with a tiny flathead screwdriver – but be careful.
Disposing of old e‑liquid and dead coils (do it right)
Please don’t pour old juice down the sink. Nicotine is toxic to fish and other aquatic life. Instead:
- Soak up small amounts with a paper towel or used coffee grounds, put it in a sealed bag, and throw it in the household trash.
- For larger amounts, take it to a hazardous waste collection point (many recycling centres accept e‑liquid).
- Coils go in the trash. Some centres recycle the metal, but most don’t – it’s not great, but it’s honest.
- Batteries (dead 18650s, built‑in battery devices) must go to a battery recycling bin. Supermarkets and electronics shops usually have them.
For nicotine safety around kids and pets, review our 5 nicotine safety rules for vapers.
Frequently asked questions (from real vapers)
How often should I clean my vape if I use sweet e‑liquids?
Sweet juices (like desserts, candy, or some fruits) gunk up coils much faster. You might need to clean your tank every 3–4 days and change coils weekly. Look at your coil – if it’s dark brown and crusty, it’s time.
Can I use vinegar to clean my vape?
I wouldn’t. Vinegar leaves a strong smell and taste that’s hard to rinse off. Stick to warm water or isopropyl alcohol for metal parts.
My vape still tastes burnt after cleaning and replacing the coil – what gives?
Check your wattage. If it’s set above the coil’s recommended range, you’ll burn the coil instantly. Also make sure you primed the coil properly. If it still tastes burnt, your tank might have a short or the insulator might be damaged.
Is it safe to leave my vape in the car overnight in winter?
Cold temperatures (below freezing) can thicken e‑liquid, making it harder to wick, and may damage the battery. Don’t leave your vape in a freezing car for hours. Bring it inside.
Want a free PDF checklist of this entire vape maintenance guide? Drop your email below – we send one weekly email with practical tips, no spam, unsubscribe anytime.
👉 Subscribe to the Kamry European Vape Guide
This is my personal experience plus research from European vape forums. Your device might have different quirks – always check your user manual first.